Pages

Thursday, February 25, 2010

My Scrap Area

I decided a couple months ago that I needed to do something with my scrap area, because I was beginning to forget what I had and things were shoved here and there. My organized chaos became overly chaotic. I had to figure something out and soon because I was loosing my mojo for scrapping!! So I saw these shelves that Ikea had and they were absolutely perfect for what I wanted. They have 16 shelves which all have 13x13 inches of space. PERFECT!! I also bought some boxes from Ikea to help hide all my this and thats. I'm not totally done, because I need to get something to fill my vase :). Oh and this is basically a corner that I claimed and the room is shared by my computer desk and various toys including a large rocking horse. You can see the bottom of the rocking horse in the bottom right corner of the photo.
This is something that I have wanted to do for awhile and finally got it down. I had SOOO much ribbon and I had it all in a box and I was getting frustrated digging through it all the time. This is a Mini Clip It Up and I know that Clip It Up makes a wall mount for ribbons, but I wanted something I can pick up and bring to my work table. I managed to get 120 clips with some of the ribbons doubled up, so I think I have around 140-150 different ribbons on here. LOVE this thing!! I found the best deal on this at Amazon and I found packages of 40 clips for around $10.00 with $1.00 s/h at Overstock.com!!

Thanks for stopping by my blog!! God Bless!!

Tuesday, February 23, 2010

Oh So Nice!!

I wanted to do a layout using Swirlydoos products that was based on a sketch made by one of SDoos awesome DT members and I finally did. This layout was made with the new March kit and I based it on a sketch made by Robin aka Lovestocreate.
One of the best things about joining Swirlydoos is having access to some AWESOME new techniques and tutorials!! This flower I did on this layout was made from a tutorial that Lisa aka StarSailorScrapper did over at SDoos. She did the tutorial using paper, however, I used a blue metal sheet from Ten Seconds Studio. So thank you Lisa for this awesome flower!!
These wood looking letters were actually done using white Creative Imaginations chipboard letters. I used Ranger "Ginger" colored alcohol ink and let them dry. Then I sanded the tops which gave them this really neat grainy wood look. I think they went really well with the photo too.


Check out my spot coloring tutorial in the previous post. It's really pretty easy to do and it jazzes up a photo a new fun way!!

Thank you for stopping by and God Bless!!

Easy Spot Coloring with Photoshop!

Spot coloring is where you take a section of a photo and make it colored and leave the rest black and white. I am pretty sure I have the dinosaur version of Photoshop, but since they pretty much stayed similar throughout the years, this should work with newer versions as well. There are so many different ways I have seen to spot color, but this is the way I remembered and to me it was the was the easiest. Like I said my PS is way older, but the same tools generally still exist but may not be in the exact same area on newer Photoshop programs. This photo below was my latest spot colored photo.
Open the photo you want to use then right click the top where the image name is and click Duplicate.
On the duplicated image to "Image" then "Adjust" then "Channel Mixer" and a box should open up.
Click the "Monochrome" box. Mine was in the bottom corner. Then click ok and your photo should be in black in white.
Drag the black and white photo over to the top of the original image and line it up.
Click your eraser tool and choose the correct size so that you can easily go over the area you want to have the color in. Zooming in makes it easier.
Once you are done then flatten your image by going to "Layer" and click on "Flatten Image" and your done!!

Thanks for looking and God Bless!!

Sunday, February 21, 2010

My Very First and My Most Recent Layouts!!

Over at Swirlydoos a thread was posted that asked us to post our very first layout along with our most recent layout. It was posted in the members only section so I am not able to post a link over there, but I thought it would be fun to post it here. My first layout was made 16 years ago when my oldest daughter was just a baby. Here is my list of items if I can remember right.
  • Baby Pink and Light Green Cardstock
  • K & Company Stickers and Diecuts
  • Unknown Brand Metal Letters
  • Unkown Brand Eyelets
  • Jolee's Boutique Rattle Sticker
  • Most Likely I Used Hermafix Sticky Dots for Adhesive
  • Decorative Scissors
  • Scissors/Trimmer

Here is my most recent layout. This was made using items from the March Swirlydoos kit and I based this on the sketch that Beggahuna did. Whoa what a difference LOL!!! Here is my list of products used.
  • Prima Flights of Fancy Papers
  • Raspberry Colored Cardstock
  • Unknown Brand Velvet Paper
  • Prima Say it in Crystals
  • Prima Brand Flowers
  • Hand Decorated Stick Pin
  • Swirlydoos Diecut
  • Making Memories Brads
  • Creative Imaginations Chipboard Letters
  • Creative Imaginations Chipboard Shapes
  • Creative Imaginations Die Cut paper
  • Unknown Brand Fiber Trim
  • Ranger Raspberry Alcohol Ink
  • Ranger Pitch Black Alcohol Ink
  • Tim Holtz Edge Distresser
  • Ranger Magenta Stickles
  • Sanding Tool
  • Glue Dots Mini Dots
  • Glue Glider Pro
  • Scissors/Trimmer

I think this layout was actually pretty mild considering the amount of items used lol. To explain the picture a little bit, this was my daughter Tyler dressed up as a modern day Little Miss Muffet. We just took this pic last week and it was purely for fun!!

Thanks for looking and God Bless!!

Wednesday, February 17, 2010

I've Been Published

I just found out yesterday that eight of my layouts will be featured in the next Scrapbook News and Review Magazine. YAY!! I had to change some posts that were made on this blog because I needed to remove the images of those layouts. So in case you are wondering what happened to some of the pictures, now you know :). I also had to take away my link within, because it kept showing images from published layouts :(. I will be putting it back in soon.

Swirlydoos update!! The new March kit should be showing up on my doorstep tomorrow or the next day!! I can't wait! There is also a couple of my stick pins included in the embellishment add-on kit. How cool is that?! Well off to do some domestic engineering around the house!

Thank you and God Bless!!

Saturday, February 13, 2010

Cardboard Letters and More Distressing!!

I am still working on some challenge layouts over at sb.c and this current layout was made for the Round We Go Challenge that Katie777 runs. It is a challenge that uses circles. I wanted to play with more cardboard today and lately I have noticed people using corrugated cardboard letters on their layouts, so I had to try it. I decided to just draw my own letters. Below I will explain how I did that. I also added a fun scroll with a hidden journaling tag that pulls out of the end. I left a sweet message to my little man in it. The background of this layout was dark brown textured cardstock that I dabbed bleach all over using an old rag. Check out my latest creation!
So here is my title close up. A quick note on the mini letters; I printed these out on my computer, cut them out and then used alcohol ink on the edges. Very easy!! As for the corrugated cardboard letters I did the following.

1) Before I peeled off my top layer, I drew the letters on the cardboard then cut them out.
2) I then peeled off my top layers to reveal the inner part of the cardboard.
3) I chose some crackle paint as a base on my cardboard. I do that most of the time, because it helps add texture. After that I used green and brown alcohol ink and topped it off with the rust color as well. I just love that color!! They came out in a sort of a camo look which is awesome for this boy page.
I again printed all my photos on matte paper because I knew I would be distressing them. I sanded over all of them and a bit more heavy sanding on the edges. I dripped some of my rust colored alcohol ink on this photo below.
Here is my little scroll that I rolled up. I just took some tag board and cut a strip long enough to roll and wide enough to tuck in a tag. I distressed the edges and tied some twine around it. I could have just used this to write in my journaling, but now I don't have to worry about undoing it. So I wrote on a section of paper and rolled it as well, then attached some twine to the end and stuck it into the scroll.

Thanks for looking and God Bless!!

Friday, February 12, 2010

Swirlydoos - Check out the Metal Butterfly!!

Over at Swirlydoos, Bonnie aka LaBonita has been doing some awesome metal work with Ten Seconds Studio metals. I'm so loving all of her awesome creations and am beginning to fall in love with working with metal myself. Check out this thread with all sorts of awesome little examples and quick tutorials!!

Metal Work

So this is my first layout featuring a metal item. I love this pic of Brooklyn being very dramatic and having it out with her sisters. This layout was made specifically for the Round Robin challenge over at SDoos. I was chosen for Round #1 and this was my creation along with some closeups.

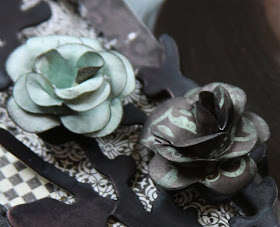
Here it is. A pic of my very first butterfly made out of metal using a stamp. Awesome isn't it!! I can't wait to do more embellies! Over at that thread there are metal covered boxes too which are so cool and there are a ton of pages with examples of some great metal work.

Thanks for looking and God Bless!!

Tuesday, February 9, 2010

Beatiful Distasterpieces

Get it? The title that is.... Disasterpiece instead of Masterpiece lol. I think I tend to crack myself up more than others :). Distarerpiece is for the fact this was a very messy layout and highly distressed as well. Over at sb.c there is a challenge for using paint and this month the twist is to paint on cardboard. I decided to use a 12x12 sheet of corrugated cardboard and painted the entire back ground. It turned into a mixed media layout and I LOVE it!! So I used some antique linen crackle paint, some rust colored alcohol ink, green and yellow smooch spritz sprays and other ink sprays I had at hand lol. By the end of the doing the background, my hands were dyed several different colors, not to mention the smudge I apparently made on my face. Enough said about that... Here is the layout.
My title inspiration is from Lisa aka StarSailor. Her blog is called What a Beautiful Mess. Most of the embellies were from the February Swirlydoos kit.
I did the title by printing out the word beautiful and then cut each one out and use rust colored alcohol ink on the edges. Then chalked over it for a dirtier look. The "MESS" letters are Tim Holtz and I love them. I did distress them up a bit.
I wanted to show a close up of the photo because I distressed it as well. This is a pic of my little Brooky sitting on a trampoline looking gorgeous with her dark brown hair and gorgeous blue green eyes. I printed my photo on matte paper (HIGHLY RECOMMENDED FOR PHOTO DISTRESSING).. then I sanded around all four sides and used rust alcohol ink. Then I took my exacto and ran it side to side over parts of it.
This is a dried up grapevine that I sell in my Etsy. I love these things and not really sure why, because it's just a grapevine lol. I think it's because it's just different. The flowers I rubbed some of the rust colored ink on for added messiness.
Some distressed ribbon. I knotted it and inked it first. Then glued it down on the circle. From the top it looks like it's tied around the circle frame, but as you can see from this picture, it isn't.

Thursday, February 4, 2010

Beyond the Bio

I often read blogs and wonder about the lives of some of the posters. I see amazing work done by them and I read about their latest scrapbooking adventures, but sometimes I just want to know a little more about them and what's beyond the biography... Ok so I have been reading the first book of the Twilight series and just finished up the chapters on all the questions that Bella and Edward have for one another. This is what got me thinking about posting a bit more about myself!! So to break away from the traditional bio, here is a piece of me.

I live on 62 acres in a small town in NW Oregon. I am a country girl at heart, but love the fact I am close enough to the civilization to survive. The view from my porch is our field, hills, some ever green trees, and mountains in the distance. I live on the end of a HUGE unfilled and unfinished horse barn in a house built on the second floor. Tin surrounds me on all sides and this makes for noisy, but soothing rain storms. As I sit on my couch typing this, I am accompanied by my 8 and 2 1/2 year old daughters. Yo Gabba Gabba is playing on our TV and I have a clear view of a kitchen that needs to be cleaned. Not to mention a wood stove that needs to be vacuumed... last week. The time is 10:58am and I still haven't gotten dressed and my hair is messy, but freshly highlighted from two nights ago. I am wanting to get up and get a second cup of coffee, but my house is cold and the laptop is warm on my lap.

My husband, who I adore wholeheartedly, is busy in his shop located about 100 yards away from our house and down a hill, working on a mud truck that he will be happily driving on March 6th when we go to a mud event in Sweet Home, Oregon. With that said, yes, we are a little redneckish :). My husband grew up riding bulls and dirt bikes, so I can honestly say his hobbies are much safer these days.

This is just a tiny bit about me for the time being, but in the future I will be sharing more. I can see from here that my coffee pot "on" light has just shut off, so that means I should get moving if I want it hot.

Thanks for stopping by and God Bless!!