Pages

Monday, May 31, 2010

~ Remember ~

No layouts or tutorials today. Just dropping off a few pictures. We went to the cemetary today, so that my husband could visit the graves of his uncles and grandfather. Watching my husband and my youngest daughter really made me realize how important it is to honor and remember our soldiers. Those who have fought, fallen and who are fighting now. It is so important to pass on their stories and teach our children to honor these men and women. I want to say thank you to each and every one of our soldiers!! God Bless you all!!


Thank you for stopping by and God Bless!!

Wednesday, May 26, 2010

~Avon Jar Cupcakes~

I had a jar of Avon Anew cream (They come in different shapes and sizes depending on the product) and the shape of it reminded me of a cupcake, so I decided to get creative with it. I didn't do a tuturial because it was my first one and wasn't sure how it would turn out. Also, I struggled a little with the paper on the edges, but the top was pretty simple. I have another jar of Anew that is smaller and even more cupcake shaped. I am hoping to put something together with that one as well and will be doing a tutorial of it. I think that it will fit into a cupcake holder so I am pretty excited to do that one.

Just an idea of what you will need... Molding paste, cupcake shapped container, and embellies.

Monday, May 17, 2010

~ Metal Roses & Crimped Butterflies ~

If you haven't worked with metal from 10 Second Studios, you are missing out. I love this stuff and I want it in every color :)!!! In this layout I used some of their dark blue metal sheets to make the little roses that GabiP does over at My Creative Scrapbook. I also did some cool looking crimped butterflies as well. Below are some close ups and more details on what I did here.
I don't want to forget to mention that this gorgeous scroll is made by Dusty Attic and you can find their products at Stay True to God. I know she was working on her website so if you are having difficulties there, just check back.
As for these adorable little roses. The tutorial that Gabi uses is perfect for paper, but I noticed that when you work with metal you don't need as many layers. So I did the first two layers of her tutorial and then I did the centers. You will have to check out her tutorial to know what I am talking about.
For these cute butterflies you will need an ability to cut out butterflies using a die machine of punch of some sort. You will also need a paper crimper. I used the Fiskars paper crimper. I distressed the edges using a small exacto knife and then I inked the edges with Smooch paint. The wire is easy and I just glue it down underneath the butterfly. To get the ends like these, just use a small paint brush handle and curl it around a few times. The body is made with two little rhinestones, but you can use stickles or liquid pearls.

Thanks for stopping by and God Bless!!

Thursday, May 13, 2010

~Sticker Books - Fussy Cutting Cont ~

This is a continuation from my previous post on fussy cutting. My kids get sticker books from time to time and most of them are not really my style for scrapping because they are so animated. However, I bought a few with some amazing illustrations. In this layout I used additional pieces from the damaged book I mentioned in my last post and I also used a couple little fairies from a used sticker book. Here is my latest layout with a pic of my daughters Rylee and Brooklyn. I drew the tree and cut it out. I outlined it in copper stickles.
This was a butterfly image I cut from the book I mentioned in my last post. The cute little birds are Dusty Attic diecuts. The bird house in the following photo is actually cut from a photograph that I took.
Here is a closer look at the little fairy images I cut out of their book along with some hearts from the damaged book. The rocks and grass are really easy to do and I did a tutorial on them that can be found under tutorials to the right of my blog.

Thanks for stopping by and God Bless!!

Wednesday, May 12, 2010

~ Fussy Cutting from Damaged Books ~

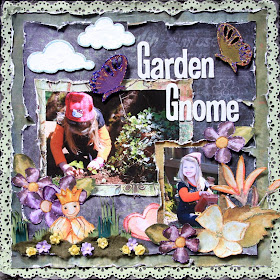
Cutting out images from pages can be very time consuming, but it is so worth it in the end. I recently did a page with a ton of fussy cutting from a childrens book that had been damaged. It was a way for me to recycle it before throwing it away. I was able to salvage many of the floral images and a couple of other cute little things from the book. This layout features items from Dusty Attic as well. The little girl belongs to some friends of ours and I couldn't help but scrap these adorable pics I took of her.
Here is a close up of a couple of clouds and a couple of the butterfly dies from Dusty Attic. I painted the clouds with gesso and outlined them in baby blue stickles. The butterflies were both misted with smooch spritz and also outlined with dark purple and fruit punch stickles.
All of the cut outs I did I outlined in Stickles for added flair and dimension. The grasses were made with cardstock and thick mulberry paper.
I don't recommend cutting up a decent book, but if you come acrossed damaged books with wonderful illustrations, I suggest trying something like this out. What a great way to have a unique page and recycle at the same time.
~Thanks for stopping by and God Bless~

Monday, May 3, 2010

~ Recycled Plastic Bag Flowers ~

I have a huge amount of plastic bags from the local grocery stores and this is because I always seem to forget to take my canvas bags to the store with me. I can't justify throwing them away, so I decided to start making things out of them. The first thing I made was some flowers. I was totally excited with how they turned out and at this time it would take me too long to do a video on how to make them, so when I get better I will do my best to put something together for everyone to see. I did make extras to sell in my Etsy, by the way ;)! The first set I made for this layout of my daughter Rylee.
For these butterflies I used canvas and die cut the shapes. Then I just inked them with different colors of alcohol ink and used Stickles for the body. They have a neat grungy look.
So here is my large 4 inch plastic bag flower that I made. I dyed this one with reds and browns. You can also get a good close up look of the molding paste that I peppered with black sparkles.
Here is my smaller 2 1/2 inch matching flower. The three little stitches are done using black wire. This layout was used with items left over from my May Swirlydoos kit.
This is a pic of one of my sets at my Etsy right now. There is a 4 inch and a 2 1/2 inch flower in each set.

Thanks for stopping by and God Bless!!