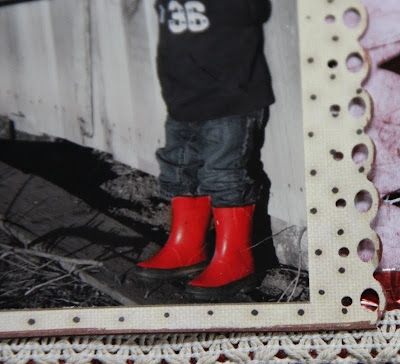
Spot coloring is where you take a section of a photo and make it colored and leave the rest black and white. I am pretty sure I have the dinosaur version of Photoshop, but since they pretty much stayed similar throughout the years, this should work with newer versions as well. There are so many different ways I have seen to spot color, but this is the way I remembered and to me it was the was the easiest. Like I said my PS is way older, but the same tools generally still exist but may not be in the exact same area on newer Photoshop programs. This photo below was my latest spot colored photo.
Open the photo you want to use then right click the top where the image name is and click Duplicate.

On the duplicated image to "Image" then "Adjust" then "Channel Mixer" and a box should open up.

Click the "Monochrome" box. Mine was in the bottom corner. Then click ok and your photo should be in black in white.

Drag the black and white photo over to the top of the original image and line it up.

Click your eraser tool and choose the correct size so that you can easily go over the area you want to have the color in. Zooming in makes it easier.

Once you are done then flatten your image by going to "Layer" and click on "Flatten Image" and your done!!

Thanks for looking and God Bless!!


tyvm for this quick tutorial, I'm definately going to try it out!
ReplyDeleteTake care and God Bless